In this comprehensive tutorial, we will guide you through the process of installing and securing a high-performance WordPress website on AlmaLinux 9 using a modern LAMP stack (Linux, Apache, MariaDB, and PHP).
Install the EPEL repository; it will be automatically added to your repository list.
dnf install epel-release setroubleshoot-server -y
Update the server
dnf update -y
First things first: install the database server. We discourage using MySQL Community Server because it restricts some advanced SQL features for community users. Instead, we recommend MariaDB.
At the time of writing, MariaDB 11.8 is the LTS version. The advantage of using an LTS version is that you avoid disruptive database upgrades. You simply need to update MariaDB through your package manager when new updates are released.
AlmaLinux also provides a MariaDB version via its DNF modules. However, we recommend disabling this module. (There are several reasons why we do not use the AlmaLinux DNF modules, which we will skip here to keep the tutorial brief.)
dnf module disable mariadb:* -y
This command disables all MariaDB module repositories. MariaDB provides a standard repository for RHEL-based servers.
Visit https://mariadb.org/download/ and select “MariaDB Server repositories.” Choose MariaDB version 11.8, the closest mirror, and RHEL 9 as the server version.
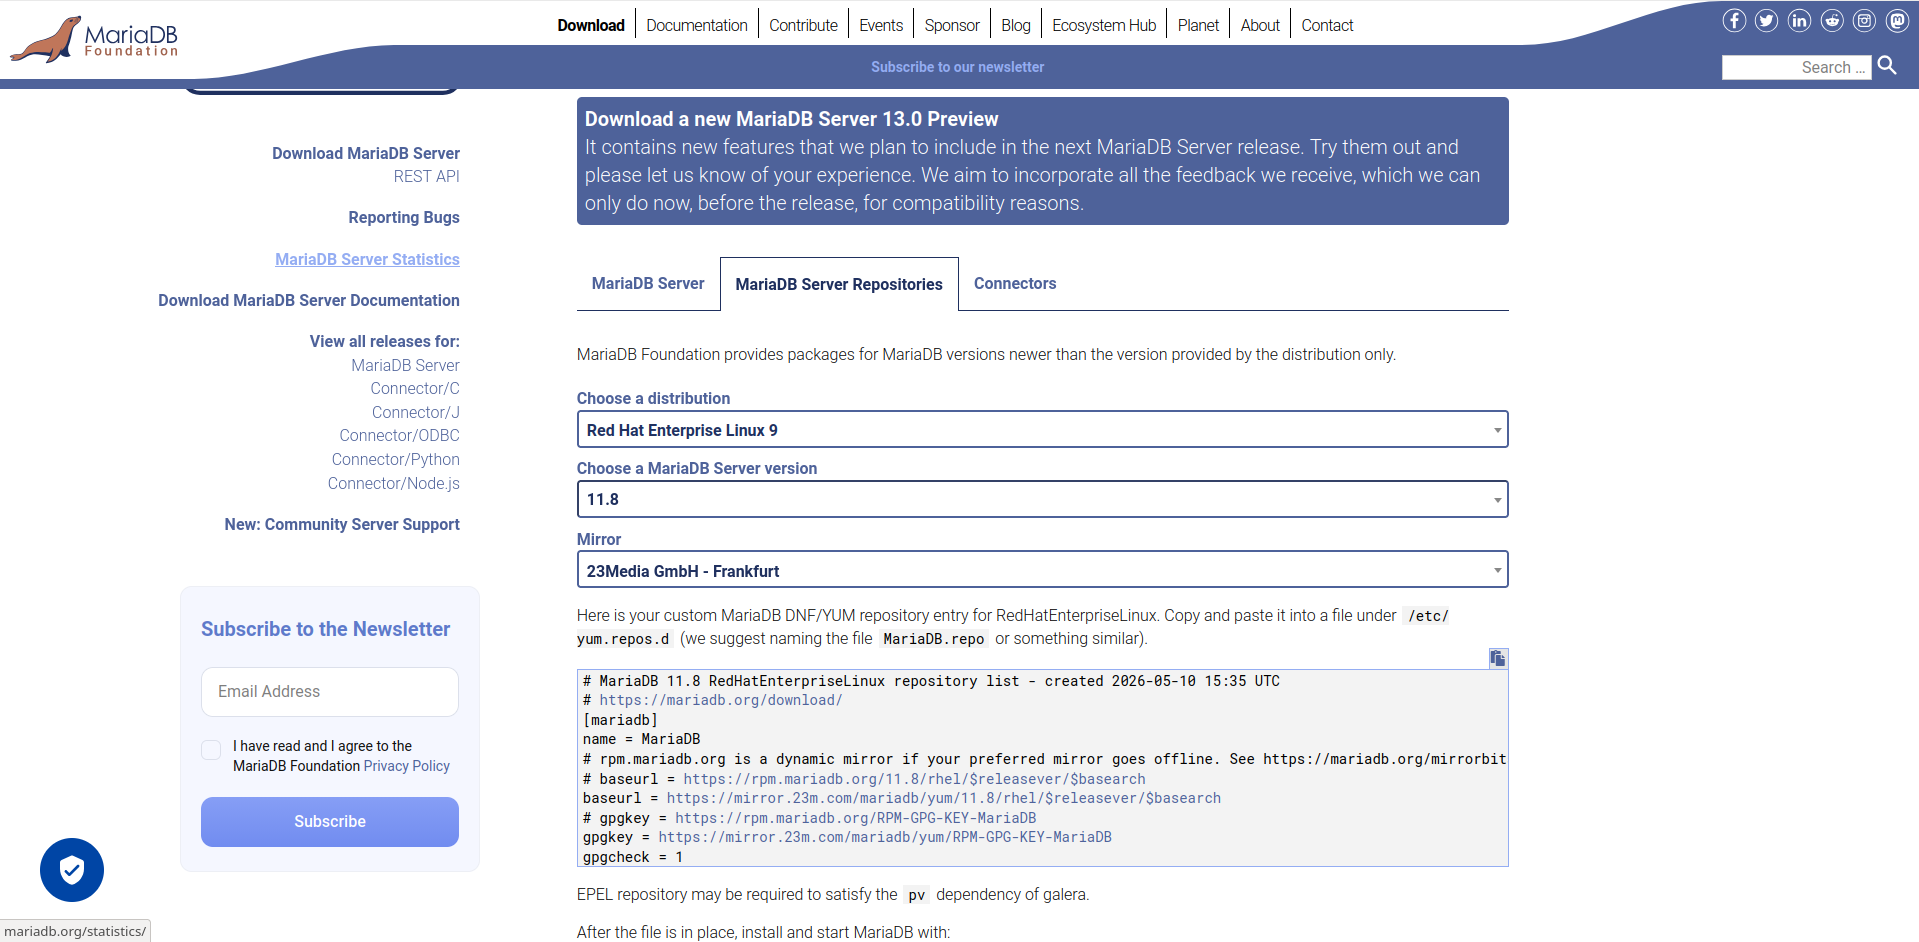
A repository configuration will appear and you have to create a file /etc/yum.repos.d/mariadb.repo and insert the configuration.
# MariaDB 11.8 RedHatEnterpriseLinux repository list - created 2026-05-10 15:35 UTC# https://mariadb.org/download/[mariadb]name = MariaDB# rpm.mariadb.org is a dynamic mirror if your preferred mirror goes offline. See https://mariadb.org/mirrorbits/ for details.# baseurl = https://rpm.mariadb.org/11.8/rhel/$releasever/$basearchbaseurl = https://mirror.23m.com/mariadb/yum/11.8/rhel/$releasever/$basearch# gpgkey = https://rpm.mariadb.org/RPM-GPG-KEY-MariaDBgpgkey = https://mirror.23m.com/mariadb/yum/RPM-GPG-KEY-MariaDBgpgcheck = 1Next, run the following command to install MariaDB:
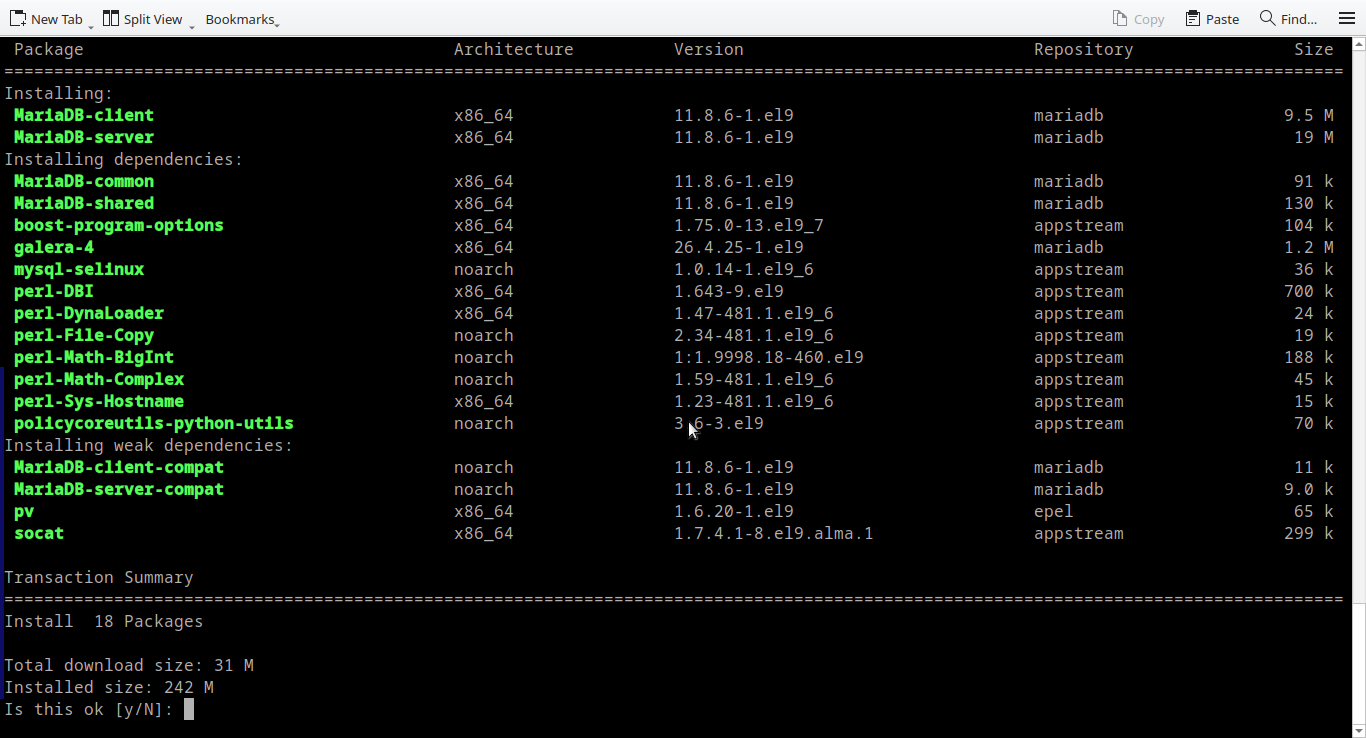
sudo dnf install MariaDB-server MariaDB-client -y
It will start installing mariadb server.
At this stage, AlmaLinux still provides PHP modular repositories. However, many are outdated, so we recommend using Remi's repositories to access the latest stable PHP releases. At the time of writing, WordPress requires PHP 8.5 or greater.
dnf module disable php:* -y
Visit rpms.remirepo.net, copy the link for the Enterprise Linux 9 RPM, and install it with DNF. This will enable the Remi repositories on your server.
dnf install https://rpms.remirepo.net/enterprise/remi-release-9.rpm
Remi has it's own modular repository set. Enable php 8.5 using following command.
dnf module enable php:remi-8.5 -y
Then start installing php. Do not start installing PHP without enabling moduler repository. It will target appstream not remi-modular.
dnf install php php-cli php-fpm php-mysqlnd php-gd php-curl php-mbstring php-xml php-zip php-intl php-json php-opcache
Do not press 'Yes' right away. When you issue this command, carefully review where these packages are being downloaded from and their versions. If the version is not 8.5 or the repository is not remi-modular, double-check the repository configuration mentioned above.
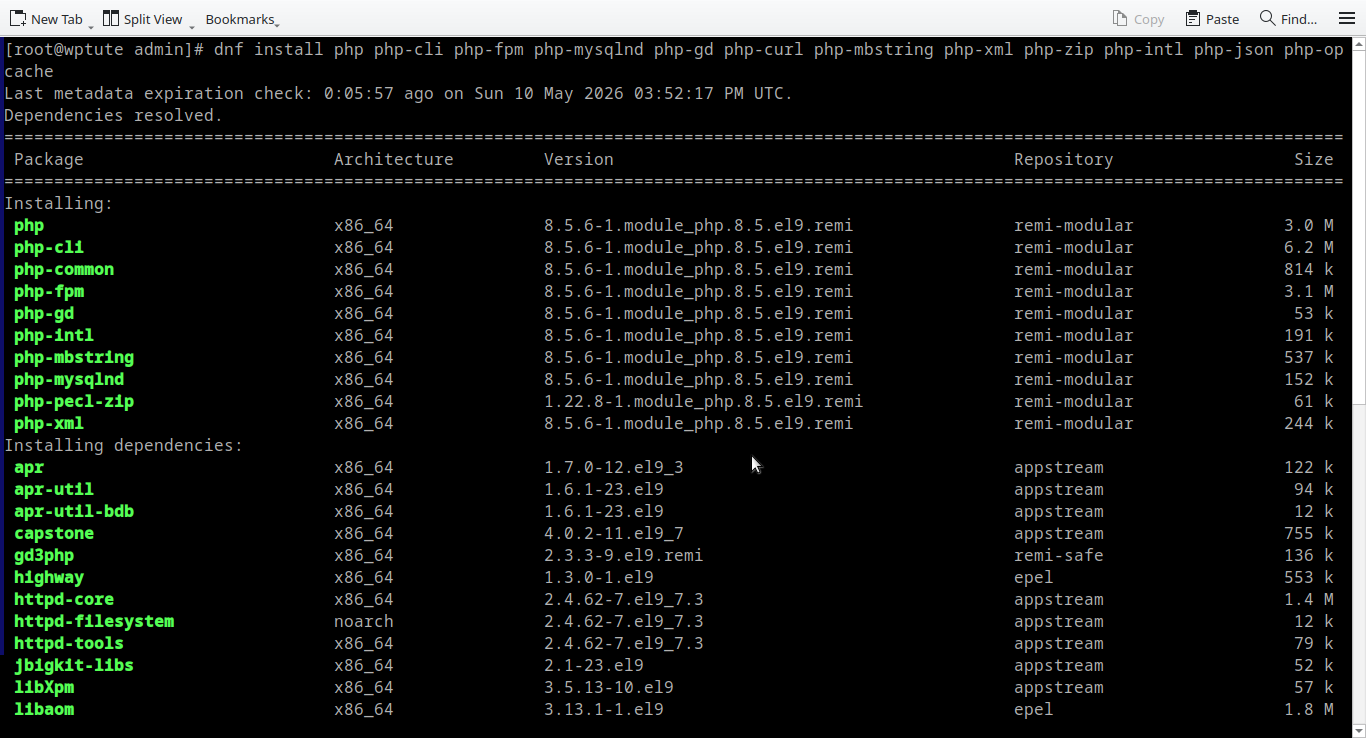
If everything is okay, press Yes to install.
Here we use Apache but Nginx is also a perfect candidate.
dnf install httpd -y
Even after installing Apache and MariaDB, the services are not yet up and running. We must configure them to start automatically upon server boot.
Let's start with the MariaDB server. Enable and start it using the following commands:
systemctl enable mariadb
systemctl start mariadb
Run the mariadb-secure-installation command to initialize the MariaDB server. Disable remote root login and ensure it is only accessible via the local shell.
Access the MariaDB shell using mariadb -u root and run the following queries to create a dedicated user and database for the WordPress application. For this tutorial, I am using a strong, demonstrative password.
CREATE DATABASE wpblog_db;CREATE USER 'wpuser'@'localhost' IDENTIFIED BY 'Au3yei8A';GRANT ALL ON wpblog_db.* TO 'wpuser'@'localhost';FLUSH PRIVILEGES;Enable and start Apache web server.
systemctl enable httpd
systemctl start httpd
By default, the server will display a start page, and the directory contents may be discoverable. Go to /etc/httpd/conf.d and remove autoindex.conf, userdir.conf, and welcome.conf. These configurations are not mandatory.
Navigate to /var/www/html, create a file named info.php, and access it via your web browser at http://your_server_ip/info.php to verify that PHP-FPM is actively serving PHP files.
<?php
phpinfo();
?>
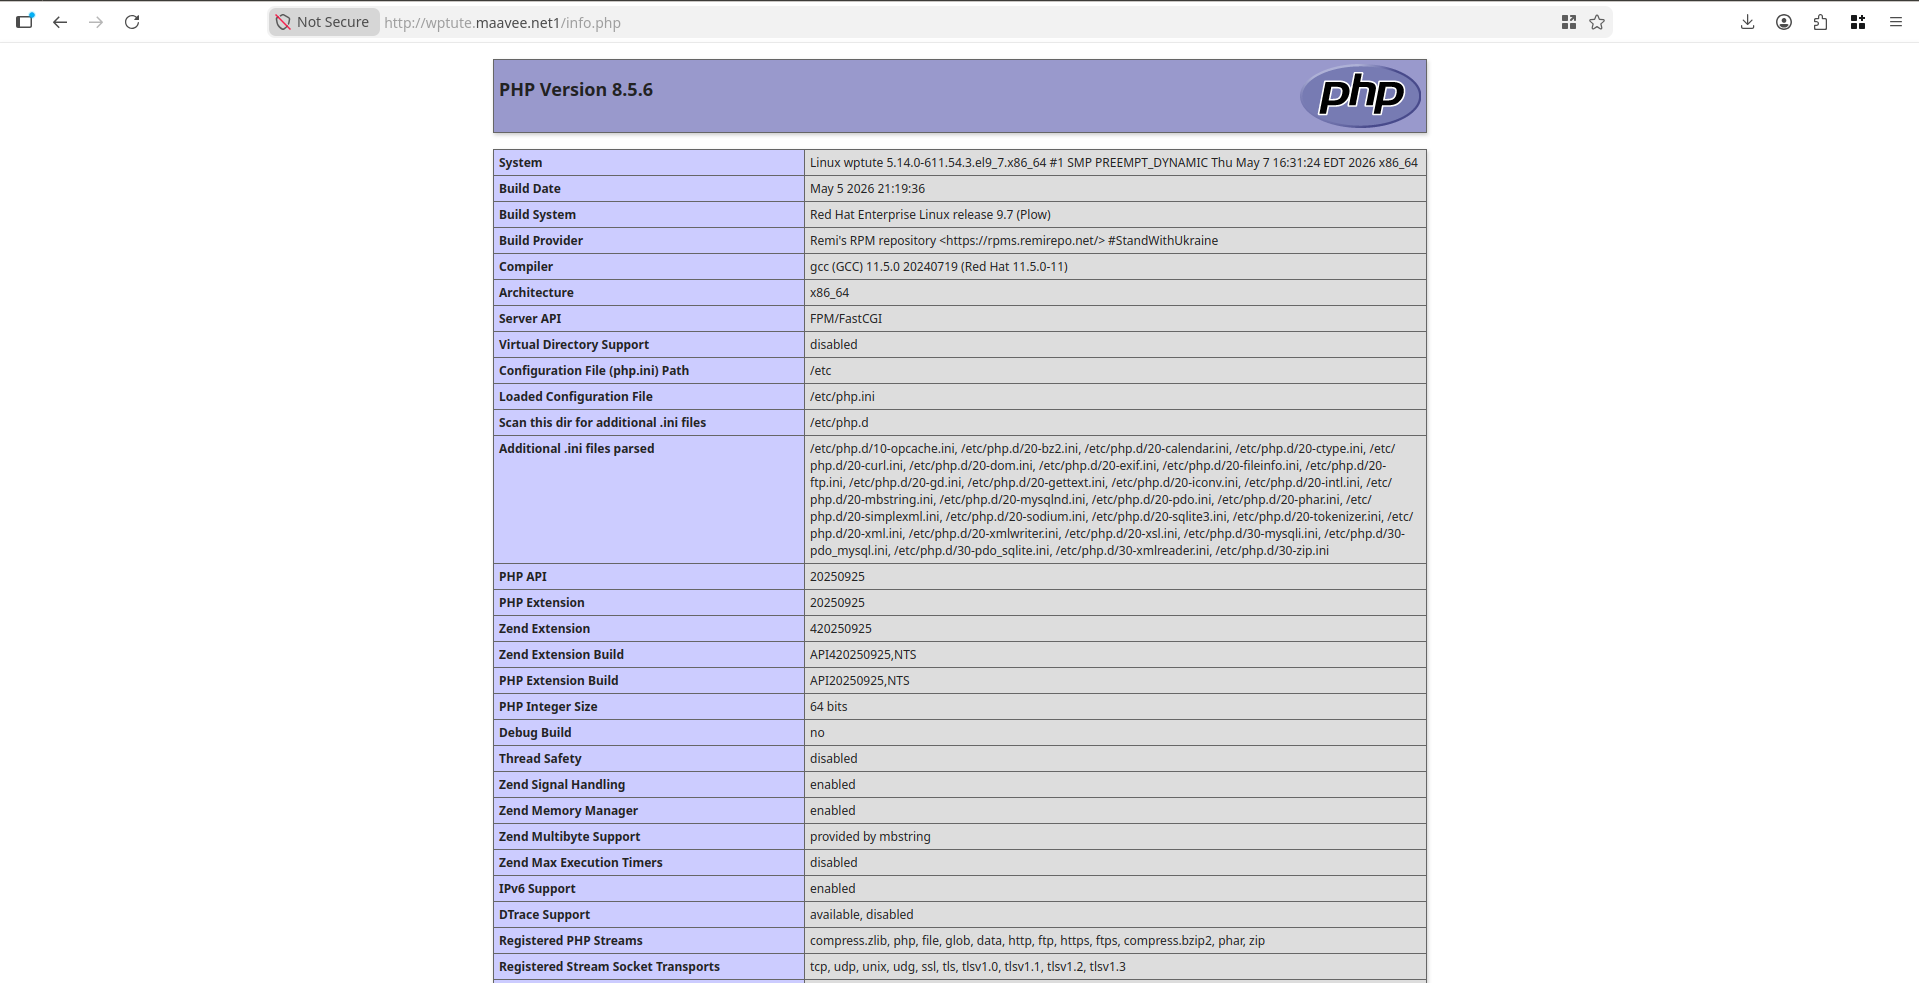
If it gives you php information, above configuration is a success.
wget -c 'https://wordpress.org/wordpress-6.9.4.tar.gz'
Extract the downloaded content into /var/www/html
tar -xf wordpress-6.9.4.tar.gz
rsync -avzL --delete ./wordpress/ /var/www/html/
chown -R apache:apache /var/www/html
Recent versions of RHEL-based systems automatically set SELinux contexts, so you do not need to worry about configuring them manually.
You will find a file named /var/www/html/wp-config-sample.php. Copy it to /var/www/html/wp-config.php and configure your database credentials.
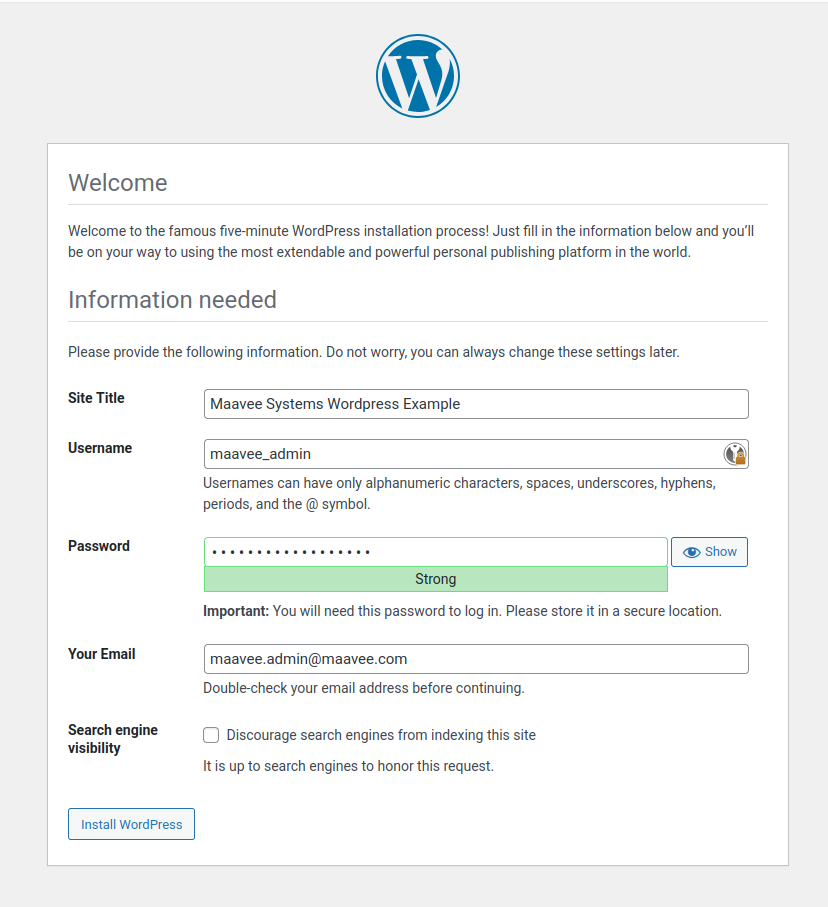
Access http://your_server_ip/ to begin the initial WordPress installation.
You now have a secure, SELinux-enabled, and functioning WordPress installation. To further enhance security, you should turn off server tokens and disable directory traversal on the Apache web server.
Find the <Directory> block for your web root (usually in /etc/httpd/conf/httpd.conf) and update it as follows:
<Directory /var/www/html> Options -Indexes +FollowSymLinks AllowOverride All Require all granted</Directory>Turn off server tokens by creating a new file as /etc/httpd/conf.d/servertokens.conf with following content
ServerTokens Prod
ServerSignature Off
Can I host a WordPress website on AlmaLinux 9? Yes, AlmaLinux 9 is an enterprise-grade Linux distribution that provides a stable, secure, and high-performance environment for hosting WordPress sites. It is an excellent choice for production workloads.
What are the prerequisites for installing WordPress on AlmaLinux 9? You need a server running AlmaLinux 9, root or sudo access, and a LAMP stack (Apache, MySQL/MariaDB, and PHP). This tutorial specifically uses MariaDB 11.8 and PHP 8.5 for modern features and long-term stability.
Why use MariaDB instead of MySQL for WordPress? MariaDB is a popular, open-source fork of MySQL that offers better performance and more advanced features in its community version. It is fully compatible with WordPress and highly recommended for AlmaLinux users.
Is SELinux necessary for a WordPress site on AlmaLinux? SELinux (Security-Enhanced Linux) provides an essential layer of security by enforcing mandatory access control policies. It helps protect your server from unauthorized access and potential exploits, ensuring that even if a service is compromised, the rest of the system remains secure. This tutorial is designed to work seamlessly with SELinux enabled.

![]() At Maavee Systems, we believe technology should serve people — not control them. Our philosophy is simple: build systems that are vendor-neutral, cloud-independent, and rooted in reliability.
At Maavee Systems, we believe technology should serve people — not control them. Our philosophy is simple: build systems that are vendor-neutral, cloud-independent, and rooted in reliability.
350c, 5th Lane, Ekamuthu Mawatha,
Thalangama North,
Koswatta,
Sri Lanka
27/2, Thalahena, Negombo,
Sri Lanka
info@maavee.com
WhatsApp
LinkedIn
Facebook